I spend a good portion of my day on a computer. A good portion of that time is spent typing. As you can imagine my hands and wrists are already showing signs of wear. I decided it was time I take preventative action.
I’m too young for this
Years of being a child of the internet and a web developer have already started to take its toll on my arms. Somedays, my fingers would hurt so bad and my wrists often felt like they had kinks in them. At 25 I’m too young for this. I shouldn’t hurt.
My right hand hurts much more than my left. I broke my right wrist pretty bad skateboarding when I was younger and have started to develop early onset arthritis because of it (I didn’t believe it would happen back when the doctor told me it was likely). My mouse isn’t the most ergonomic thing in the world (it isn’t bad actually). Plus I actually have pretty good mousing habits so I decided the keyboard should be the first thing I replace, particularly because I do most of my typing on a cramped 15in Macbook Pro keyboard.
Market research
When it comes to keyboards, there are pretty much three options for ergonomics:
- Standard (like the one you are probably using right now)
- Curved (with a ‘well’ for each and the whole board has a slight horseshoe shape to it)
- Split (each hand is separated to varying degrees)
I actually have a coworker with a curved MS keyboard. After trying it, I wasn’t sold on just being curved, while better, it didn’t let me keep my wrists at a comfortable angle. I tried one of these ‘sculpted’ MS keyboards in the store; I wasn’t all that impressed and it was only marginally better than the other one. I had heard some respected developers talking about using truly split keyboards and how much better they felt using them so I decided to look into those. My search lead me to the Kinesis Freestyle2. After seeing the price of that last one, I thought to myself, “I could get a decent mechanical keyboard for that price.”
It’s worth noting that these have all been rubber dome type keyboards and I’ve always wanted a mechanical keyboard. Mechanical keyboards just feel better than dome and membrane keyboards. There are a variety of switch types to choose from, each distinctive feel. I did a quick look to see if I could find any split mechanical keyboard. This gargantuan and this more compact guy were all I could find. It also came with a gargantuan price tag.
What’s an Ergodox
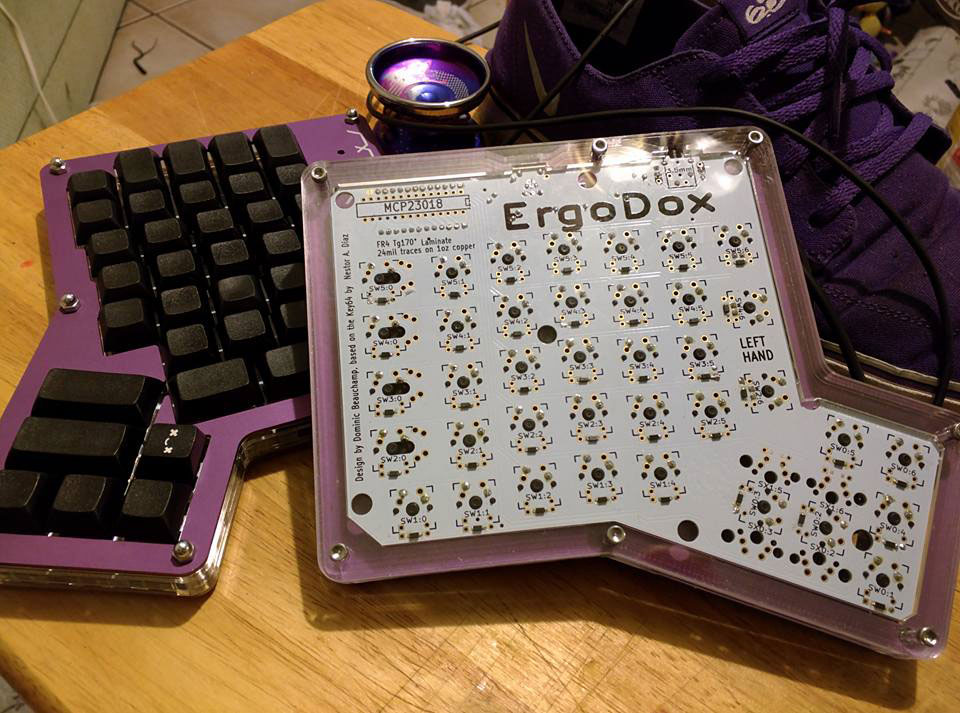
As I continued to flex my Google-Fu, I came across the Ergodox. An open source / open hardware keyboard. This scratched every itch; it was mechanical (and I could choose switch type) and it was a truly split design. As an added bonus it is fully programable; literally every key can be customized and the board supports multiple layers (whole key layouts). Of course not everything is perfect. First of all, depending on you source they can approach the $300 mark (ouch). Which brings me to point two; you can’t just buy one. You have to build one.
There are two ways of getting the parts. You can wait for Massdrop to run another drop on them (they run one a few times a year); or you can source the parts yourself. Since a drop was just run not too long ago and I wanted my fix now I decided to source it myself. Thankfully the Ergodox website has a handy part list that links out to Digikey to order all the internal components. That left getting the keyswitches, case and keycaps. I picked up Cherry MX blue switches (tactile and clicky), the PCBs and an acrylic / aluminum case based on Lister’s design from MechanicalKeyboards. I also picked up some blank PBT (plastic used in premium key caps) DSA (flat profile with spherical dishing) from Signature Plastics. The build wasn’t cheap, but it was right around the same cost as getting it from Massdrop.
The build
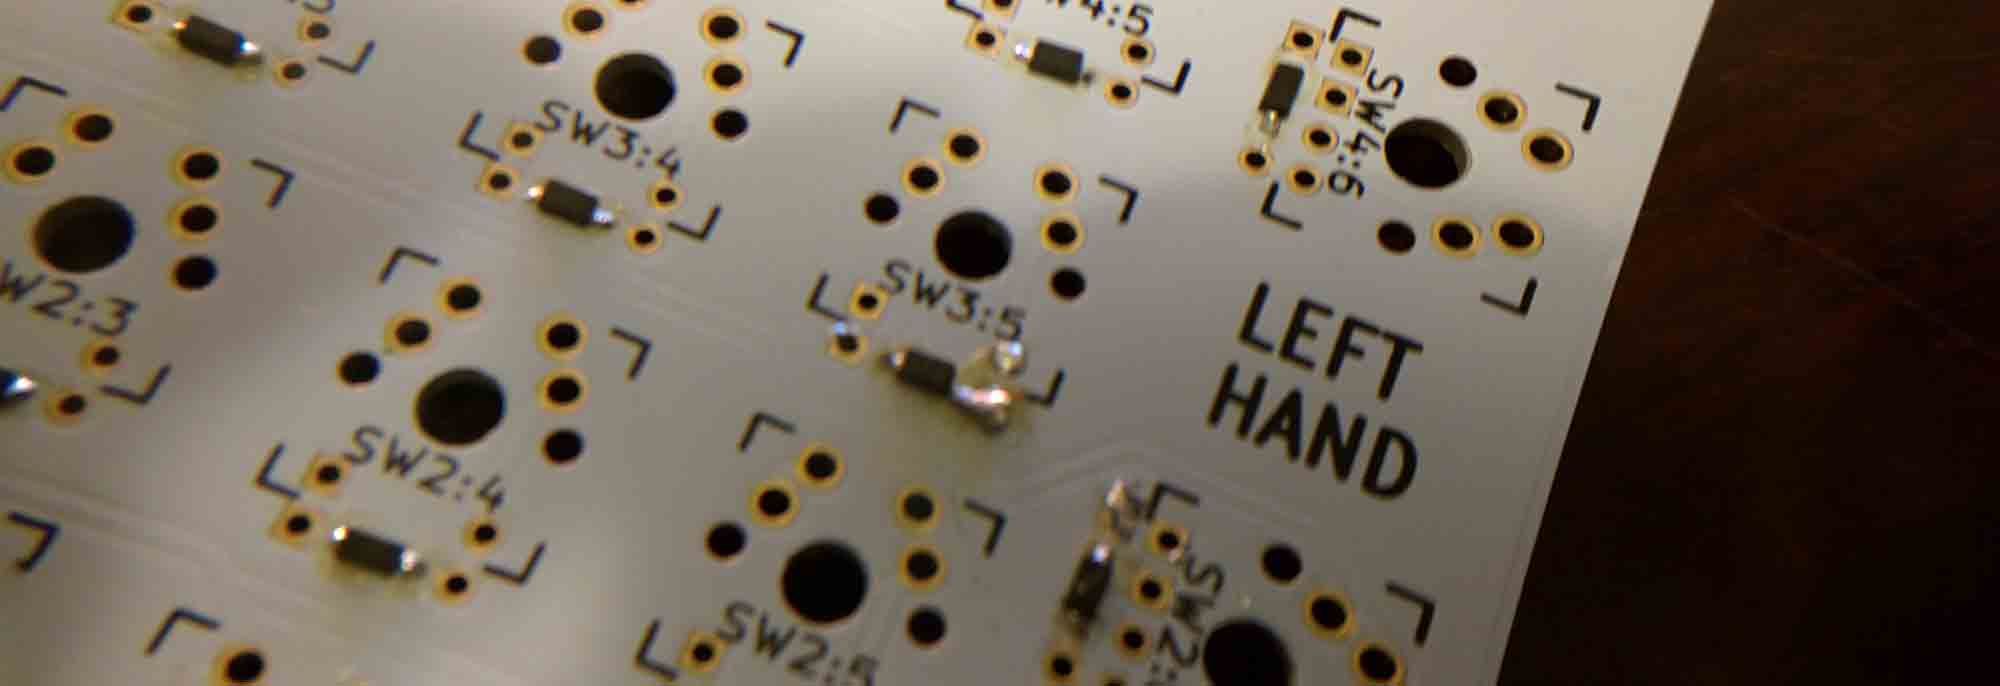
As I said I sourced the majority of the parts from Digikey. I knew going into this would be a challenge with all the tiny SMDs (surface mount diodes) and this being only my second soldering project. There are close to 400 solder points on this board. Then when I received my Digikey package, I started second guessing this project. The SMDs are unfathomably tiny. Once everything had arrived I set out to start building this. I followed Massdrop’s wonderful instructions to assemble the board and their awesome GUI configurator to create my keymap.
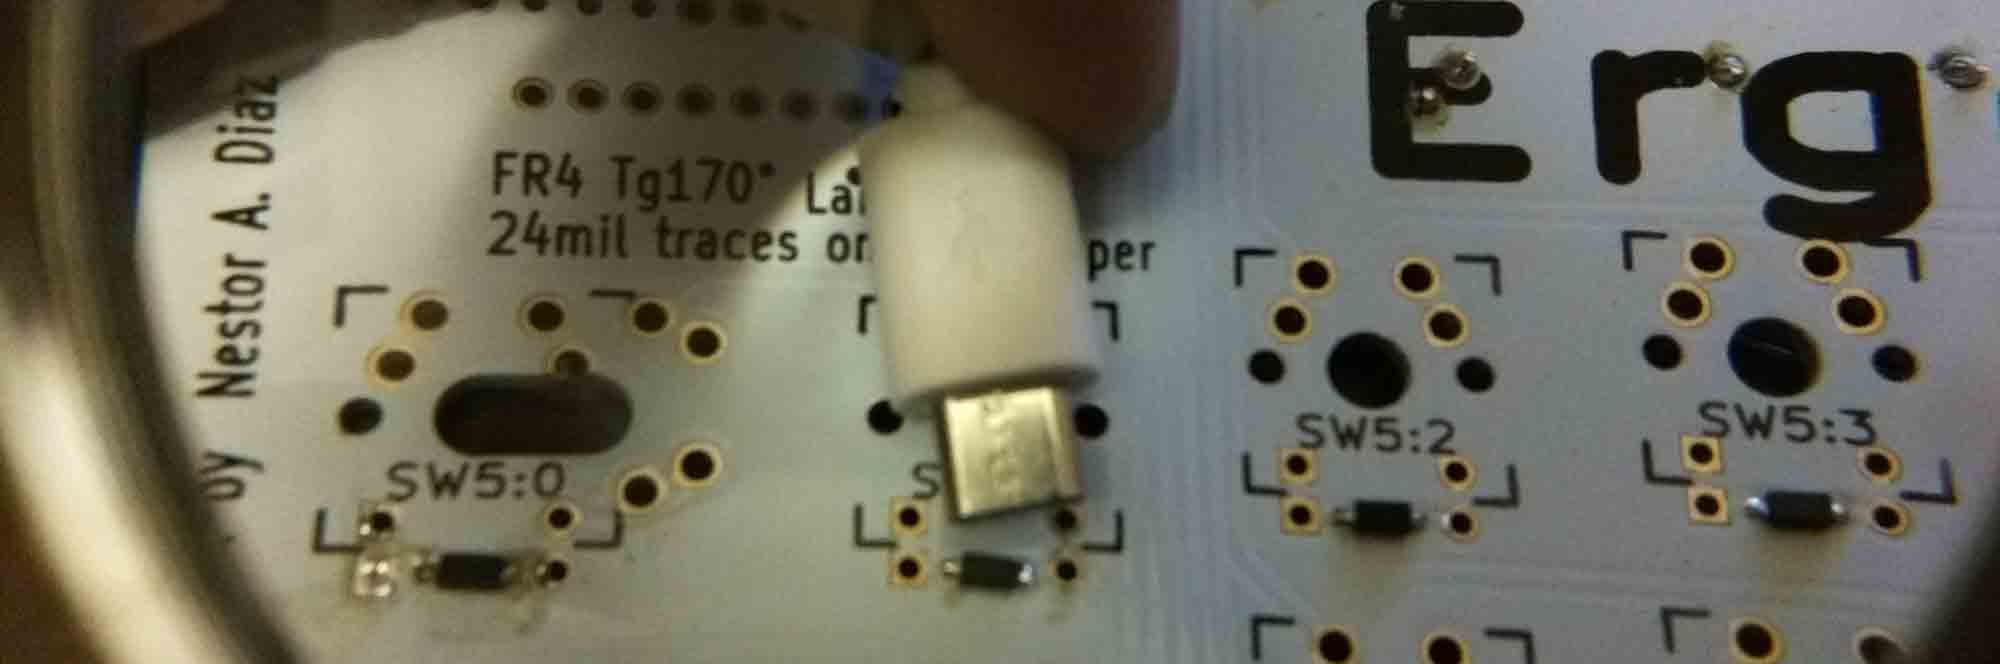
Based on recommendations, I checked out the EEVBlog’s video on SMD soldering before I actually did any of the soldering. Once I got in the groove, it actually wasn’t too bad; it was actually quite fun. The trick was to tin one of the pads, place the SMD, reflow the tined pad and finally solder the other side. Doing this in an assembly line fashion made for quick work. I did have one hiccup; I ended up lifting one of the pads on the one of the switch’s diode on the right hand. I was able to jumper it to an adjacent pad. The rest of the build was a walk in the park being primarily through-hole soldering. The Mini USB was an interesting experience as it’s extremely easy to accidentally bridge the pads.
Testing
After I had everything assembled, it was time to flash the Teensy (a controller board used as the brain of the keyboard). I hit my first road block. When I plugged the board in, the Teensy would power on, but the programming app couldn’t see it. It turns out those pads that are easy to bridge; I bridged them. I was getting power but no data. I reflowed all of the pads on the Mini USB port and tried again. The app saw the board no problem and I got it flashed. Right away I saw the OS prompt saying the computer detected a new keyboard.
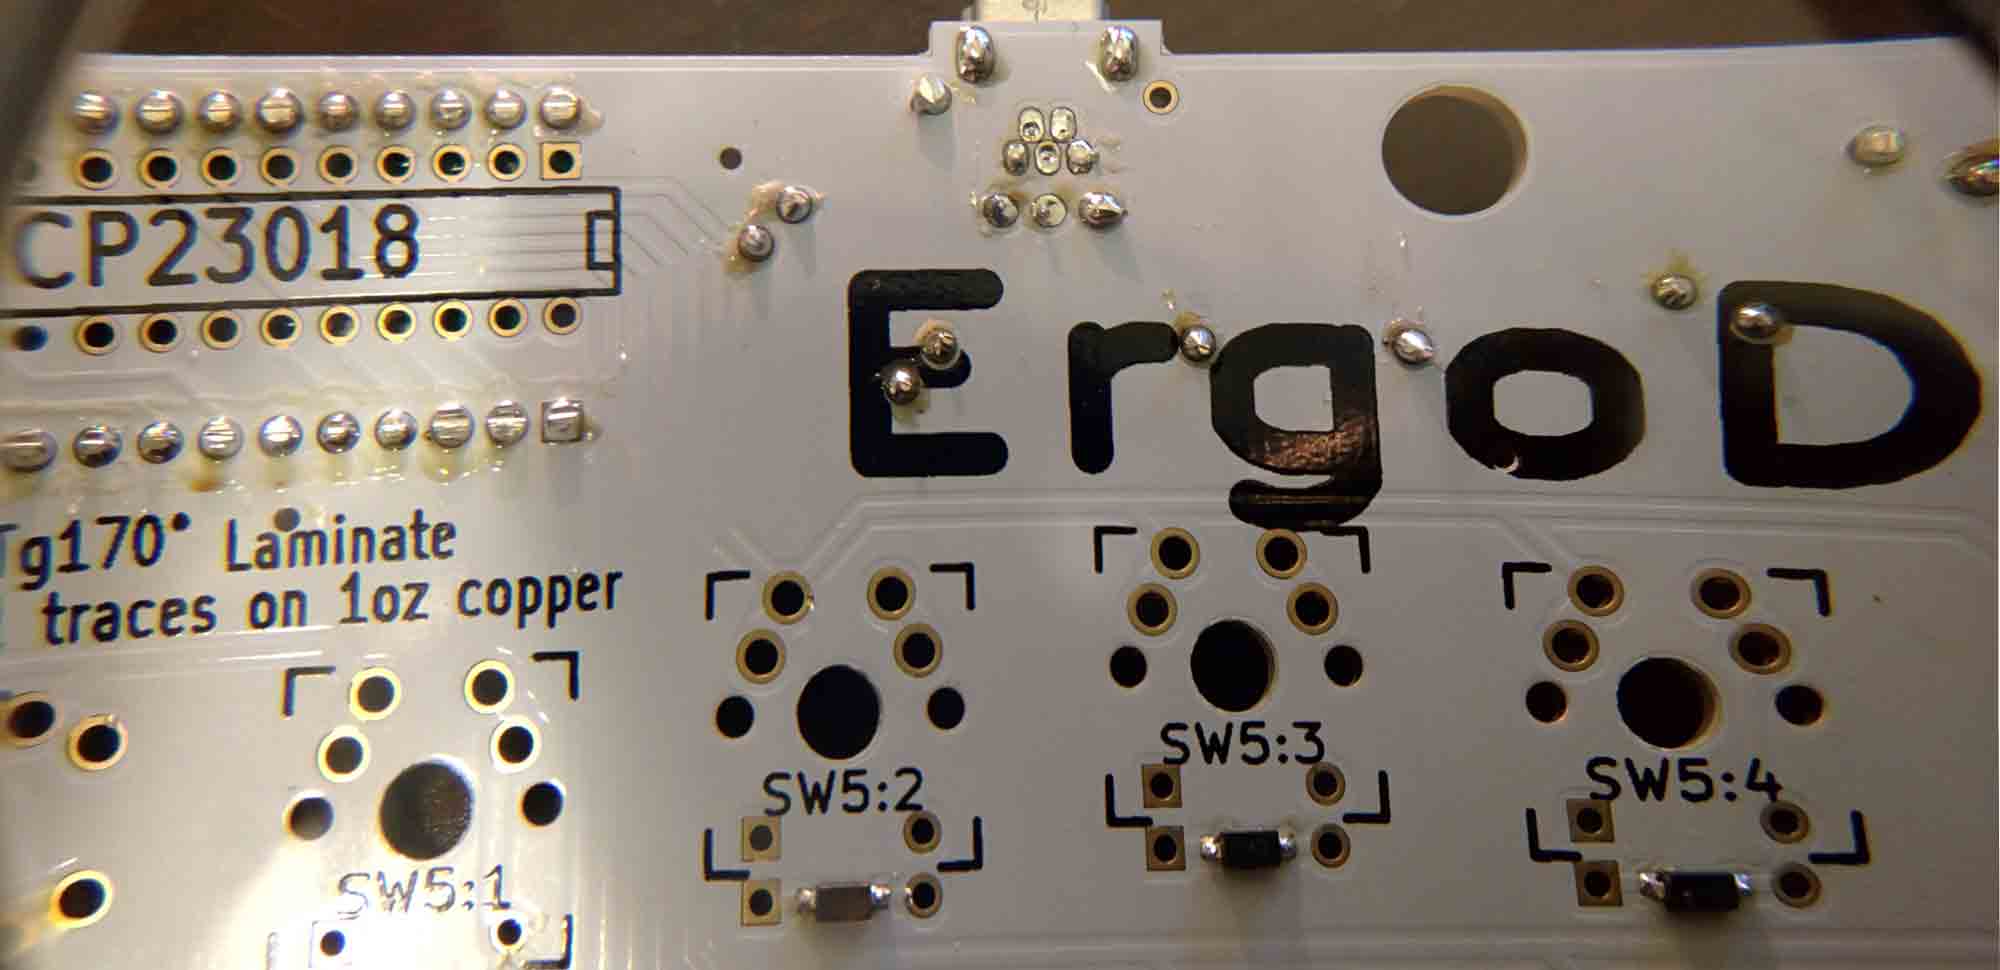
I tested the right hand first. I am proud to say every key worked fine first try. Then came time for the left hand. I wasn’t so fortunate on that side. Issue one: the cable I bought to connect them was a TRS cable (think stereo headphones), but I needed a TRRS cable (think stereo headphone plus mic cable). Damn you Amazon Merchants and your identical listings for two different products. Because of this there would be a short every time I connected the halves causing a USB is drawing too much power warning. A few days later my replacement cable arrived and I tried the left hand again. Issue two: I had two dead keys. It turns out I had only soldered one side of the diode for each key; a simple fix. After that, everything was peachy. I bolted everything together and went to town adjusting to the new layout. Check out my full build log.
My one month review
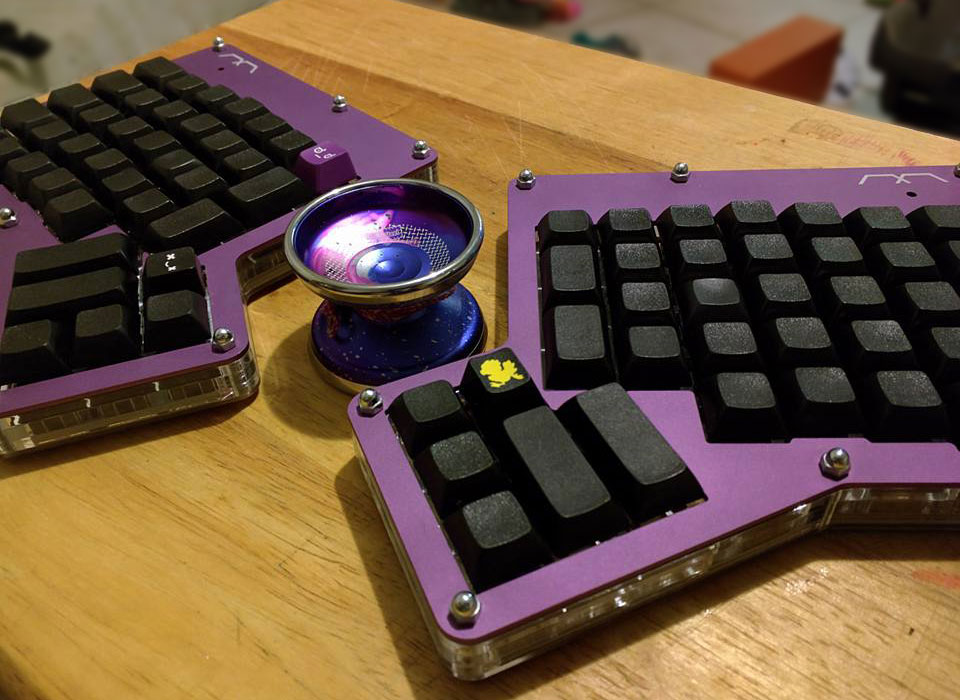
First let me just say the build is very solid. There is no flex when typing and the case feels like it’s made of one solid piece. Typing has been a joy to say the least. I absolutely love my clicky blue switches (switch types are color coded). I would recommend that anyone new to mechanical keyboards pick up a switch tester before committing to anything as keyswitches are roughly 50¢ – $1 a piece.
It’s funny, everyone who uses a mechanical keyboard boasts about how much nicer the switches feel over rubber dome or scissor switches. At first I didn’t really feel it. They did feel a bit nicer, but not they way I was led to believe. Then it happened; after hours of using my Ergodox I stopped using it for a few minutes and went back to my Macbook’s keyboard. It felt horrible. As reference, I have always loved the feel of Logitech and Apple’s scissor switches. Cherry MX blues have forever ruined that for me, they just feel so much better.
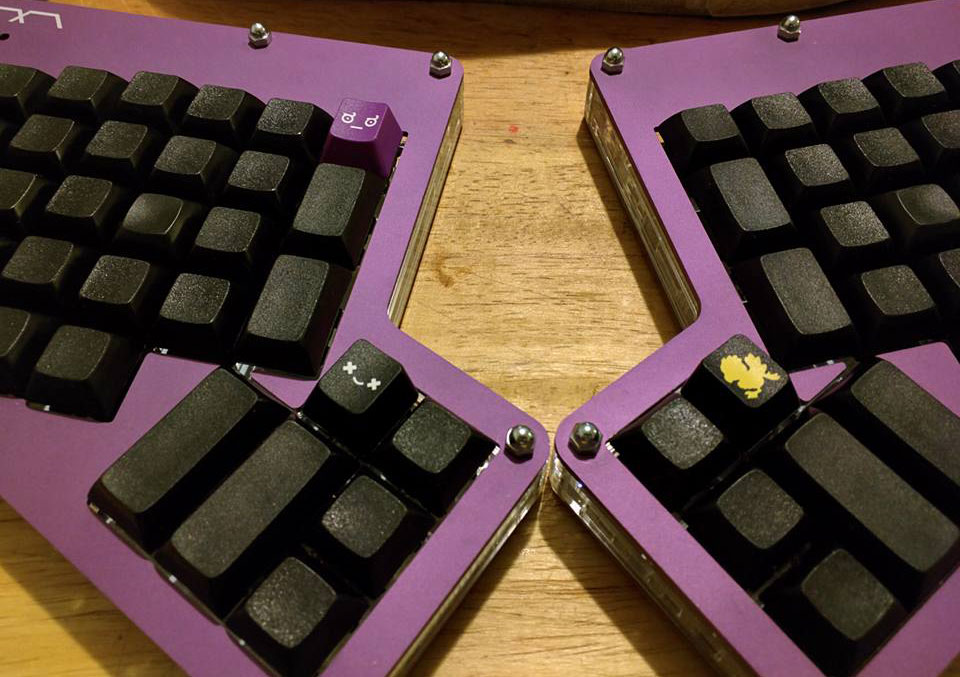
The important part about an ergonomic keyboard is its ergonomics. The Ergodox has three main things going for it. One, it uses a columnar layout rather than the traditional staggered layout. This makes for more natural finger movements. Two, it’s split in two separate pieces. This let’s both hands be in just the right location and have your wrists at just the right angle for comfort. Three, because of the split, they can do interesting things with the layout; namely the Ergodox’s signature thumb clusters which move keys like space, enter, backspace and delete away from your over used pinkies and puts them under your under used thumbs.
Within a day or two I noticed the soreness in my fingers and wrists was fading. Within a week it was gone. Part of it is minimizing the use of my pinkies. Part of it is that I slide the halves around my desk as I shift positions so that no matter how my hands are positioned, they are always perfectly centered on the two halves.
The columnar layout took less than a week to get used to. The bigger issue is the split, I reach for center keys with the wrong hand and can’t do that on the Ergodox, so I have been forced to relearn to touch type using the correct fingers. Besides the center letter key issue, I also have a tendency to use my middle fingers for keys that should use my index fingers. I have to admit, the blank keycaps felt like a mistake for the first week or so as I got used to it, but is no longer an issue anymore. The DSA profile of the keycaps feels great as does the texture they have.
Going back to a normal keyboard is pretty easy. I’ve been asked about that a lot. That said, I make more mistakes on a normal keyboard than I used to now—especially if I’m trying to type fast. That brings me to my next point. I do type much slower on the Ergodox than on a normal keyboard. I’m getting faster everyday, but until the new layout is second nature and I no longer need to think about it, I’m afraid I will continue to be slower.
Final thoughts
I love this keyboard and there’s a certain satisfaction in having to do all the leg work and assembly. Typing on it feels great and has helped all the pain I was experiencing. That said, it’s not for everyone—that’s for sure. Between the split layout, thumb cluster, having to build it yourself and cost there is a significant barrier to entry and use. If you don’t mind soldering and are looking for a split keyboard I would whole heartedly recommend it.